

Last week James attended Tabletop Gaming Live at Alexandra Palace in London - the first time Needy Cat’s had its own stand at a big show like this! He had an amazing time talking to all sorts of interesting people and running demos of a couple of our games. Loads of people were blown away by our newly announced Atlantis Miniatures Skirmish Game, even if we do say so ourselves…
Rewind to a week before the event. We were both sitting in our office on a Friday afternoon when I asked aloud whether we had two painted warbands for the demos - or, for that matter, a board to play on. Cue a few moments of confusion, a mad scrabble, and a week-long bout of incredibly intense hobby activity. The montage would have been epic!
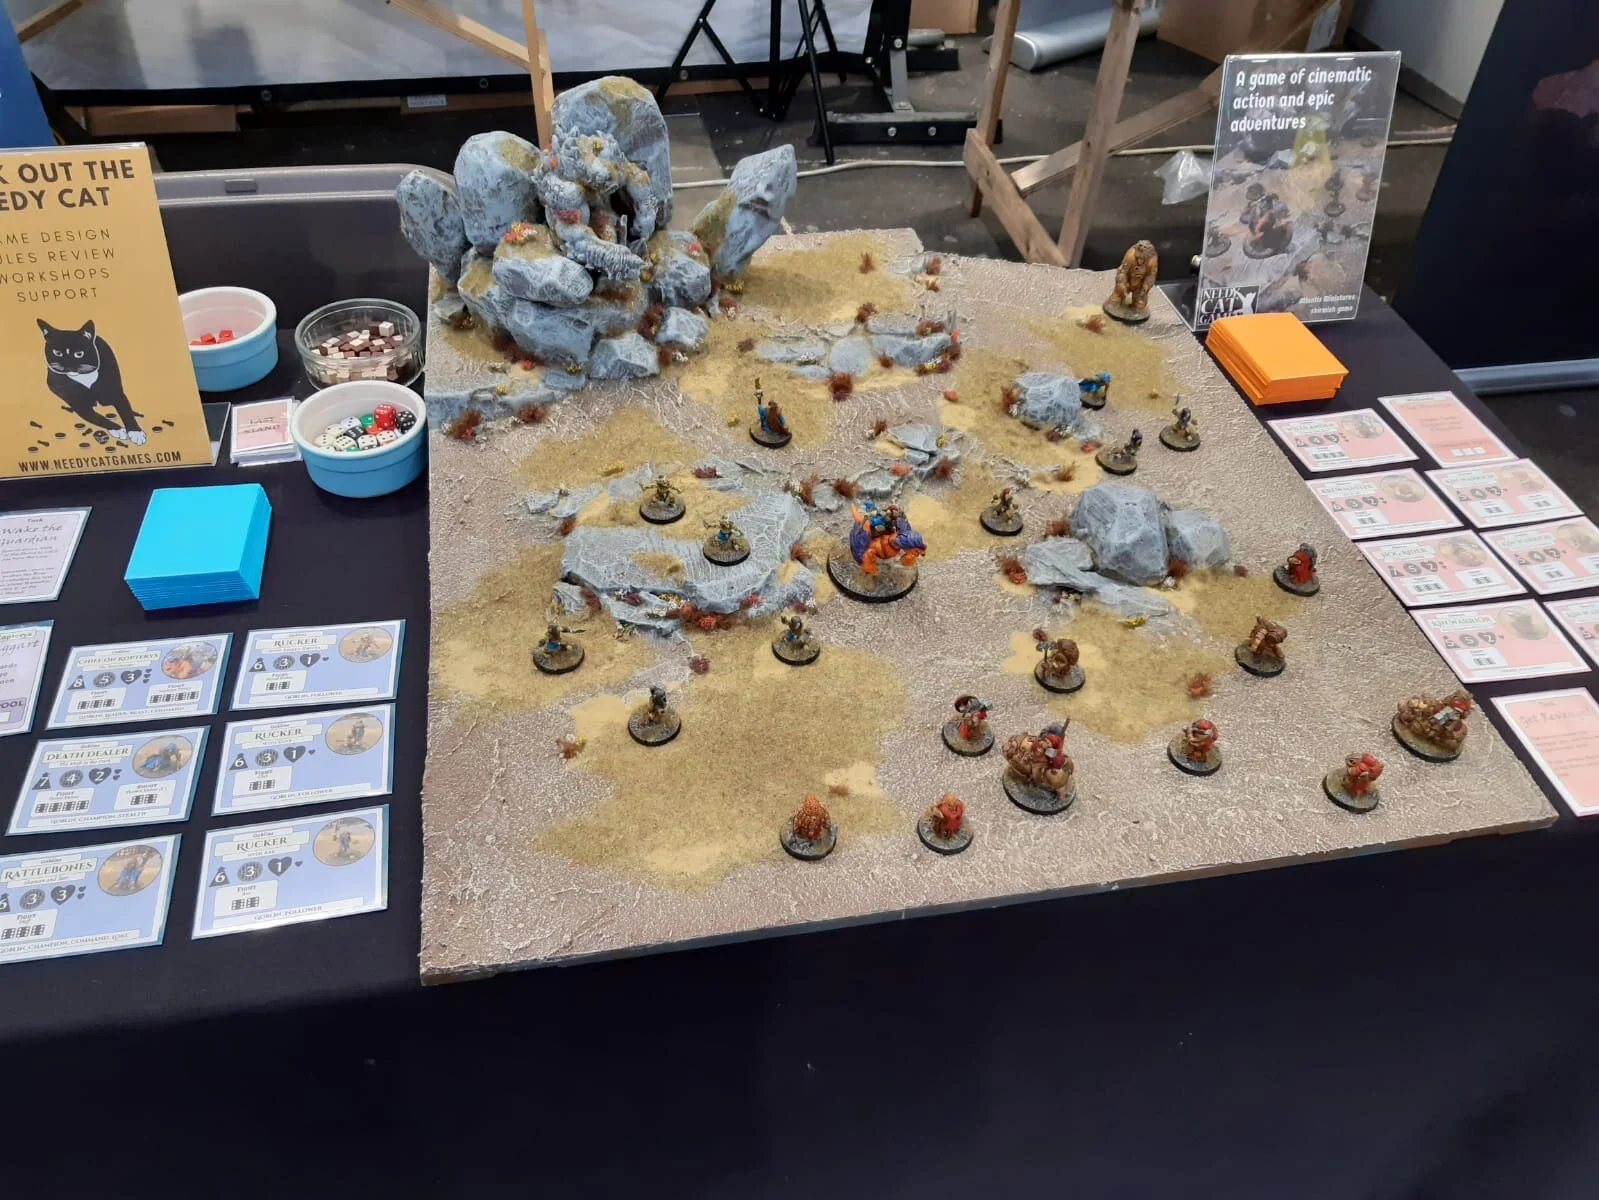
The final shot of the full gaming board and warbands at Tabletop Gaming Live.
James was busy putting the finishing touches on the game itself, tweaking and polishing and making sure it was ready to be unveiled, so most of the hobby activity fell to me. Considering the short space of time we decided to paint up a load of minis, then use one of our 2’x2’ flat gaming boards with some scatter scenery. However, when I came to make the main piece of scenery (more on that in a bit) I couldn’t find a base large enough, and didn’t have any tools handy to make one. For a long-standing (slightly lapsed) hobbyist, this was a shocking situation to be in - when you’ve been building and painting miniatures and scenery for as long and James and I have you also have an inclination to hoard anything that might be “useful” one day, so not being able to find something is a weird, alien feeling! What I did find, however, was an unpainted Games Workshop Realm of Battle tile, which I’d bought years ago for an Armies on Parade project that sadly never saw the light of day.
We had to make a decision: use a slightly bland, functional, generic-looking battlefield with our existing board and scatter scenery (achievable) or turn the newly-discovered 2’x2’ tile into something characterful and representative of the Atlantis miniatures setting we’ve been working on (mad). Oh, and this decision had to be made on Wednesday night. James was leaving for the show on Friday morning.
People who know us won’t be surprised to hear that we went with the latter option. Hey, we used to make tables like this for GW store intro boards all the time! Sure, it’s been a decade or so, but you never forget skills like that, right?
One of those key skills is this forbidden knowledge: polystyrene is amazing for rocks, platforms and cliffs (and very hard-wearing if you treat it right), PVA glue will stick almost anything given enough time, and hot glue guns will stick almost anything if you’re in a rush!
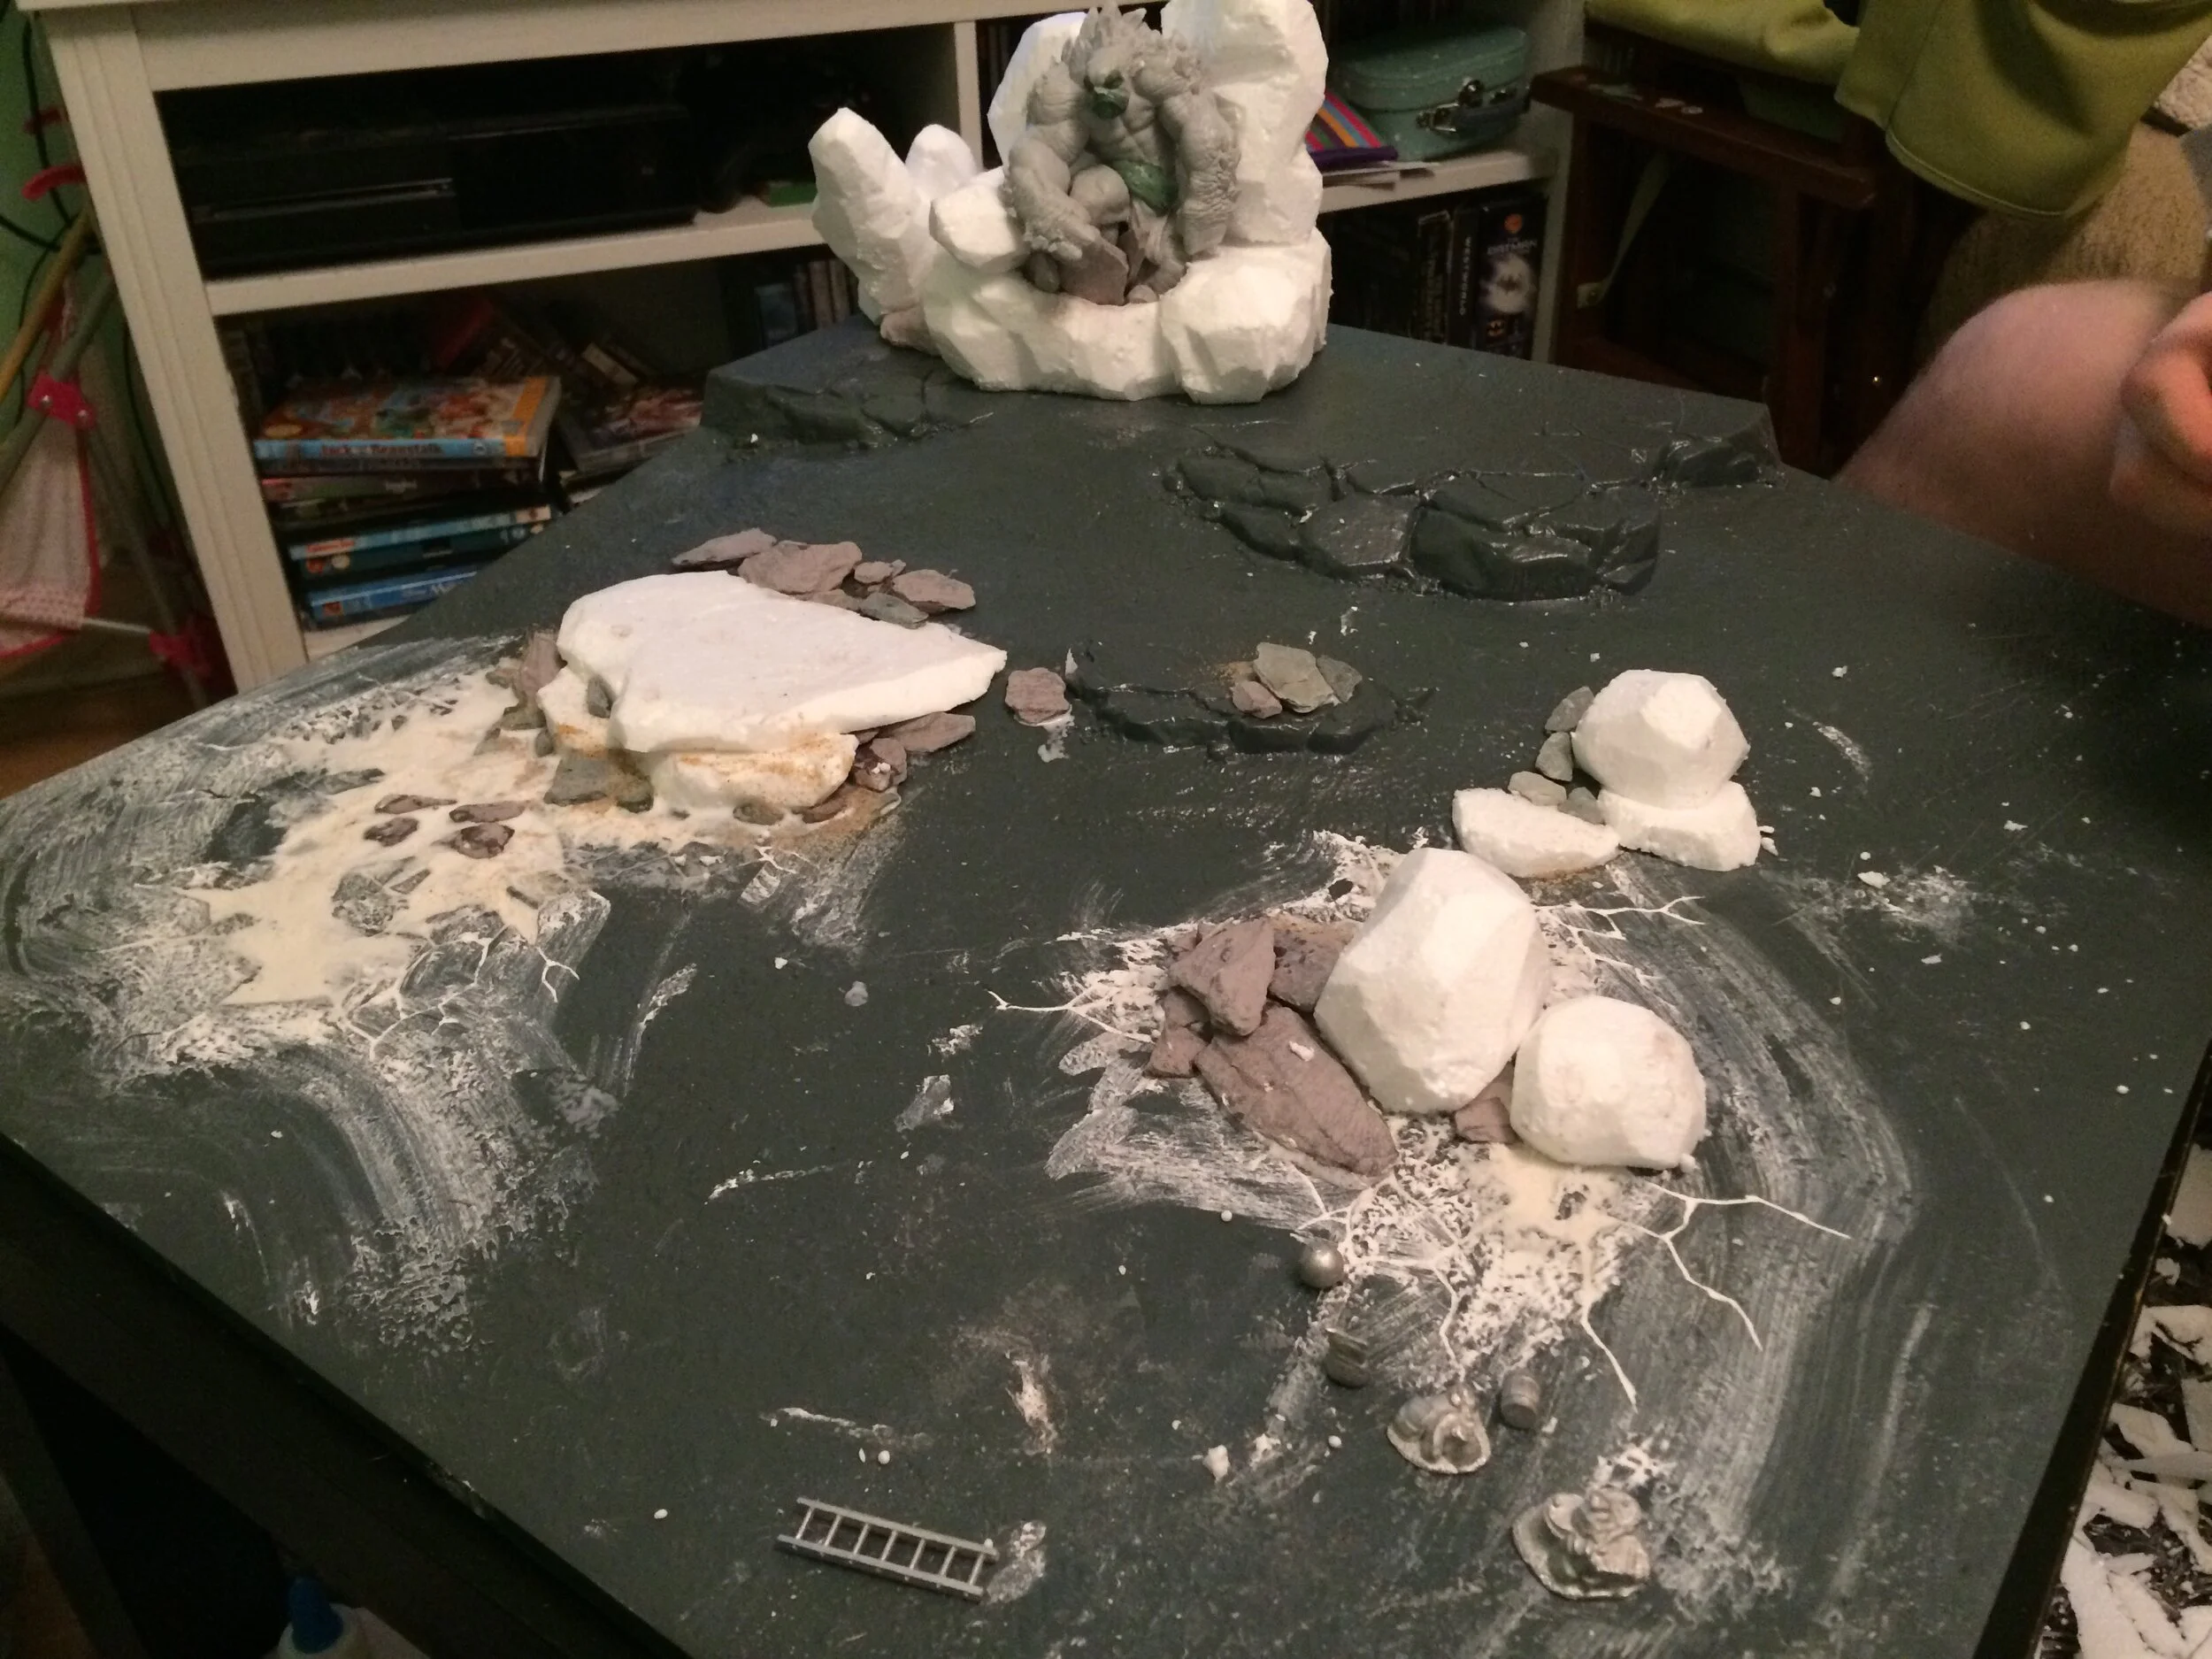
Here’s the board in progress! We added some additional rocks and flat surface area with polystyrene, and filled in the ubiquitous skull pools.
Another key skill is the use of what we used to call “sand mash”. This a lovely, gloopy mess that you get when you mix Polyfilla, PVA glue and fine sand (birdcage sand is great, as you get some variation in grain sizes) then add a tiny bit of water and mash it all into a paste. Once this dries it’s incredibly hard-wearing and provides a great texture for drybrushing, so we used to cover all our scenery in it. It looks good on cliff faces, rocks, the sides of buildings, bases… oh, and it’s great for pushing into gaps and helping stuff stick to / blend into the base (or, in this case, the board tile).
(Note: for the rocky areas of the board, we wanted a different texture, so we left the sand out and applied it to the rocks first, then added the sand and applied it everywhere else. Polystyrene has a bad reputation for being crumbly and easily broken, so a lot of people don’t use it for scenery, but if you give it a couple of coats of this you’d need to be seriously clumsy to damage it!)
Here you can see sand mash being liberally applied onto our board.We used a mixture of big brushes, smaller brushes and a rubber spatula.
Once the sand mash is dry you can move on to painting. Normally it dries overnight, but in our haste to build the board on Wednesday we went a bit too thick. Oops! We rigged up a dehumidifier, a heater and a desktop fan first thing in the morning, and between that and a bit of careful hair-dryering it was good to go by the afternoon.
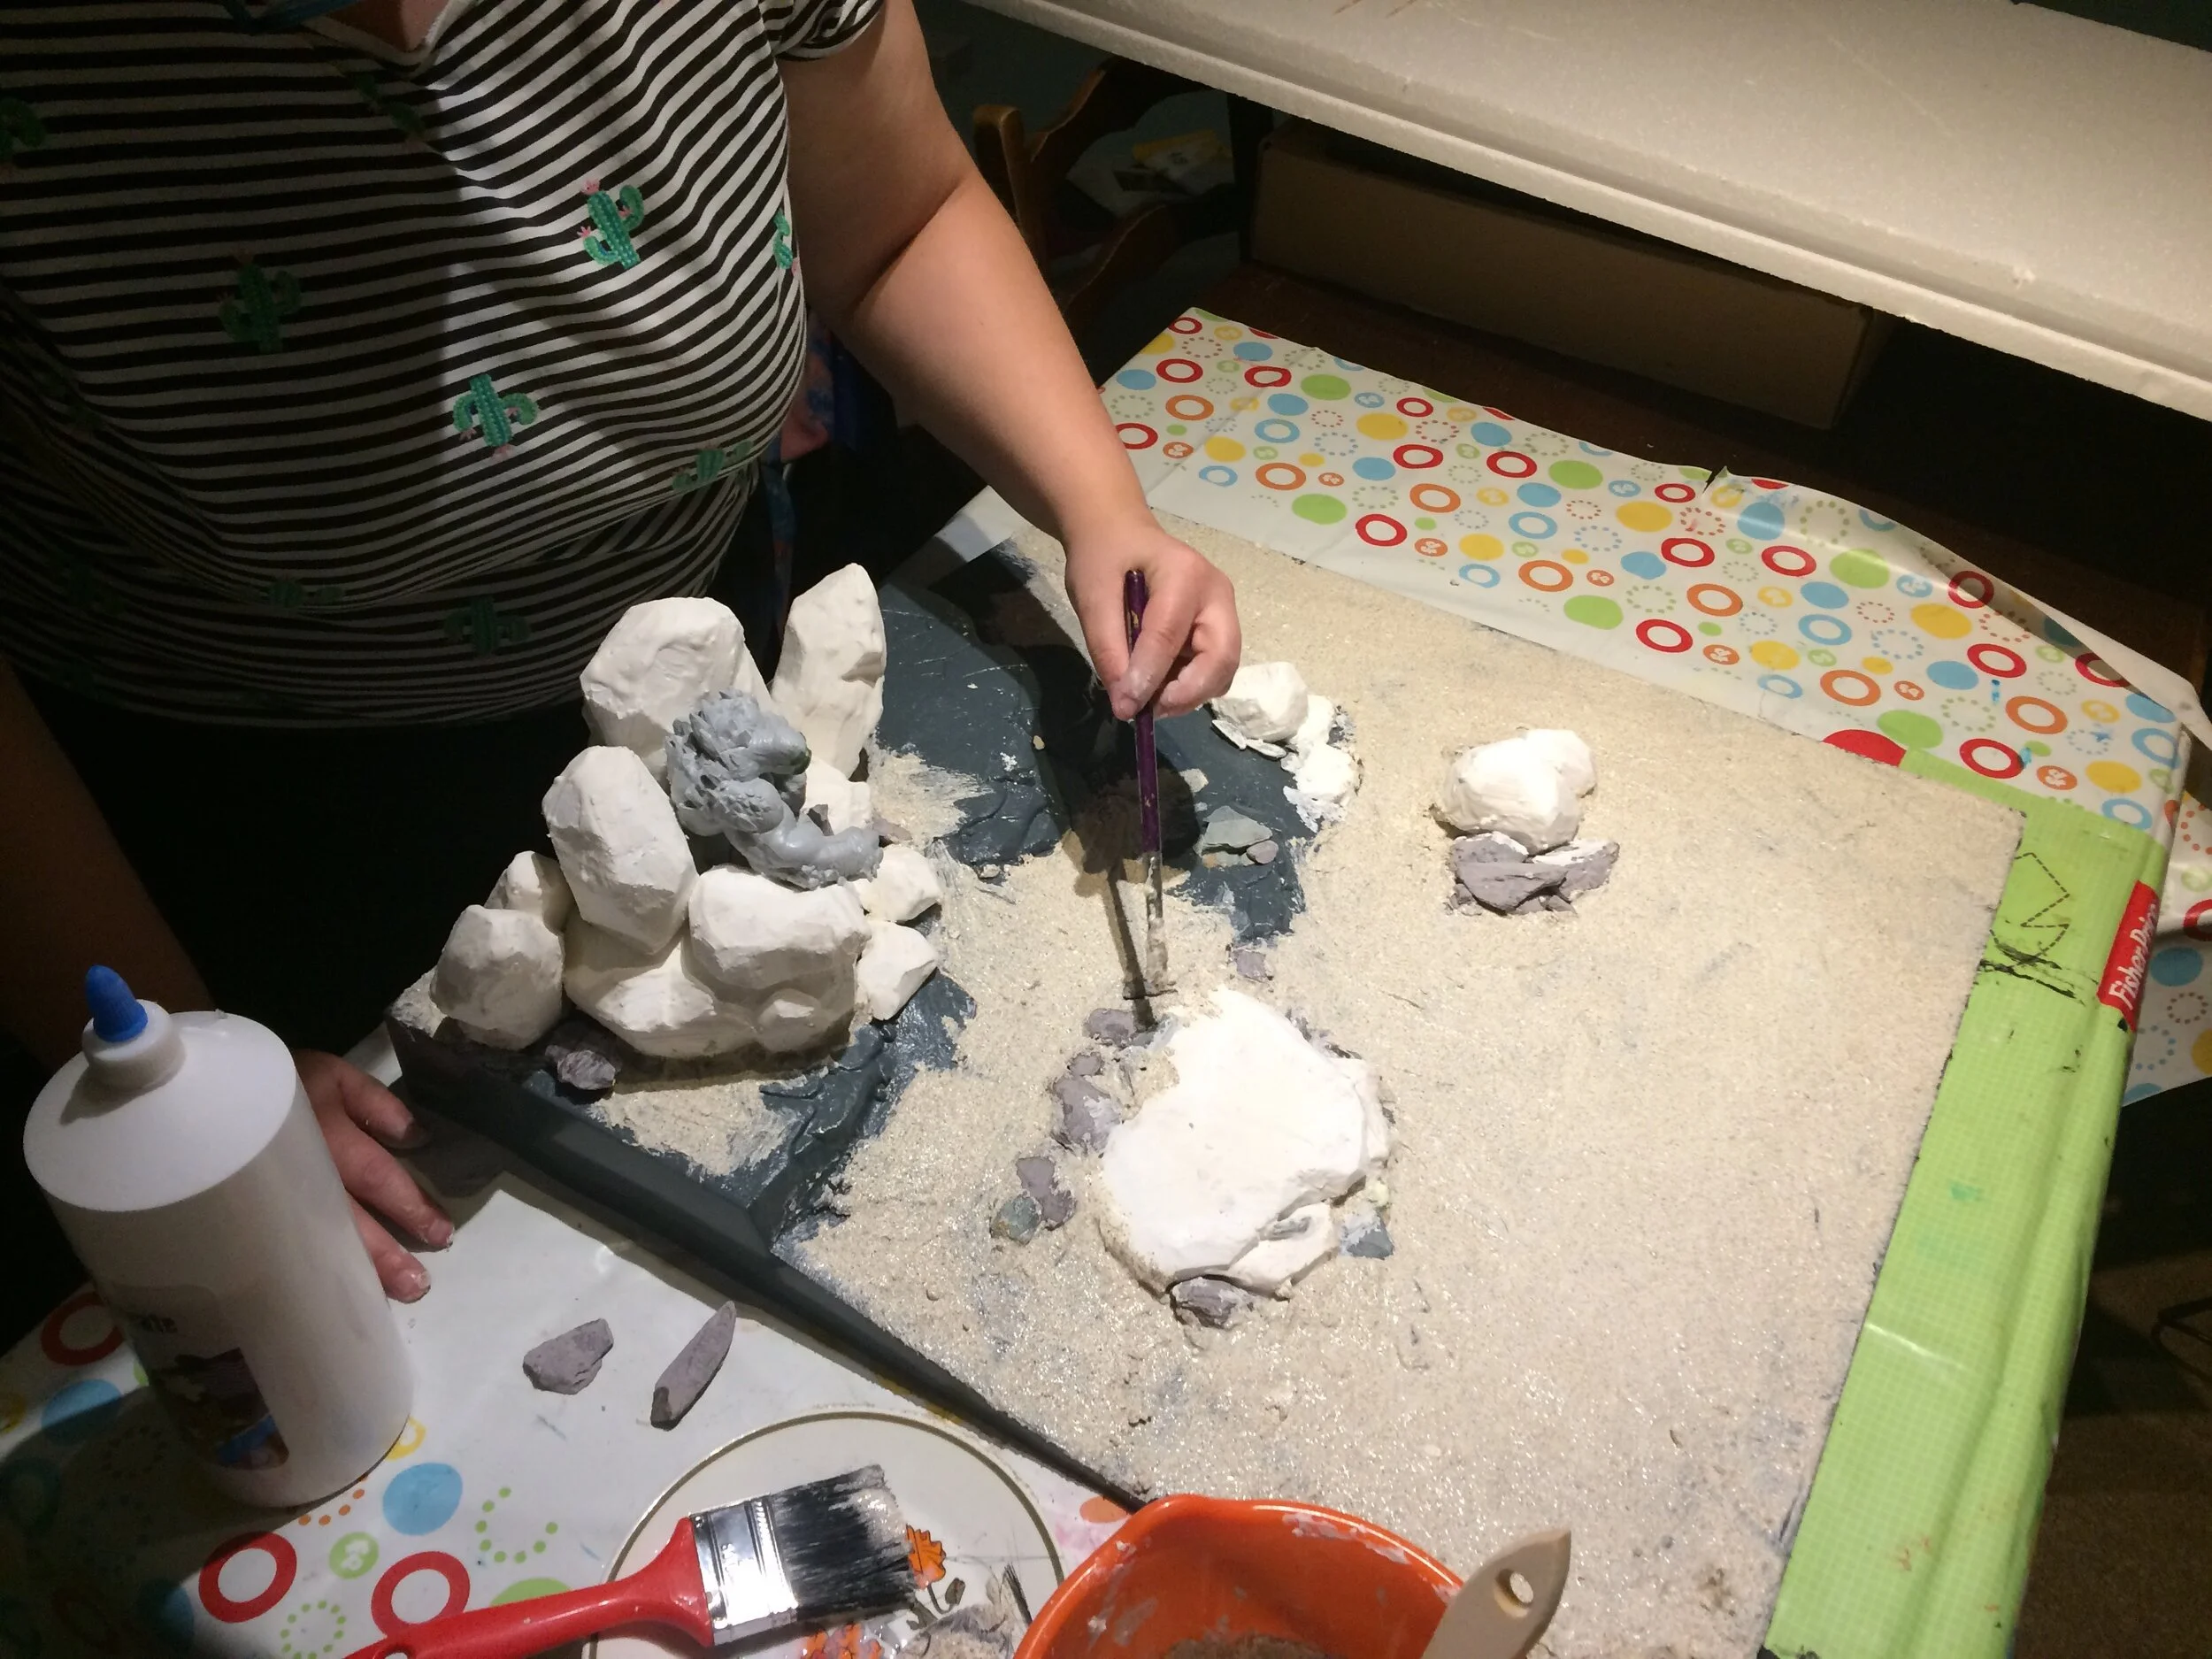
Earlier on I mentioned a particular piece of scenery I wanted to add - you can see it in the photo above! Atlantis Miniatures have a great range of trolls, and in the setting for the game they’re mythical creatures who long ago settled down and turned to stone, and are only now starting to wake up! We wanted to incorporate one of these into the board, which was a case of reposing the model, resculpting its face a little so it looked like it was sleeping, then carving a load of rocks for it to be sitting on.
Painting the board was dead simple - it was almost entirely done with drybrushing. First, I gave the troll a sprayed basecoat. Then I got out a big paintbrush some acrylic paint, and covered the whole board in a dark base layer. Brown is my preferred base layer for absolutely everything when it comes to painting scenery!
SOPHIE’S TOP TIP: If you’re doing this yourself, and you want to use spray paint, make sure you cover all your polystyrene with sand mash or watered down PVA glue – or the polystyrene will dissolve! You can see where you’ve put PVA / sand mash by adding a bit of paint to the mix before you apply it. Doesn’t matter what colour, as you’ll paint over it, but you’ll be able to easily tell where you still need to cover.
The reason I like brown - even for grey stone - is that you get a more realistic look by doing a series of heavy grey drybrushes over brown, rather than going from dark grey to light grey. I don’t know why, but if they’re just solid grey, they look fake! It’s a bit like how trees need a bit of grey on them – if they’re 100% brown, they look really plastic.
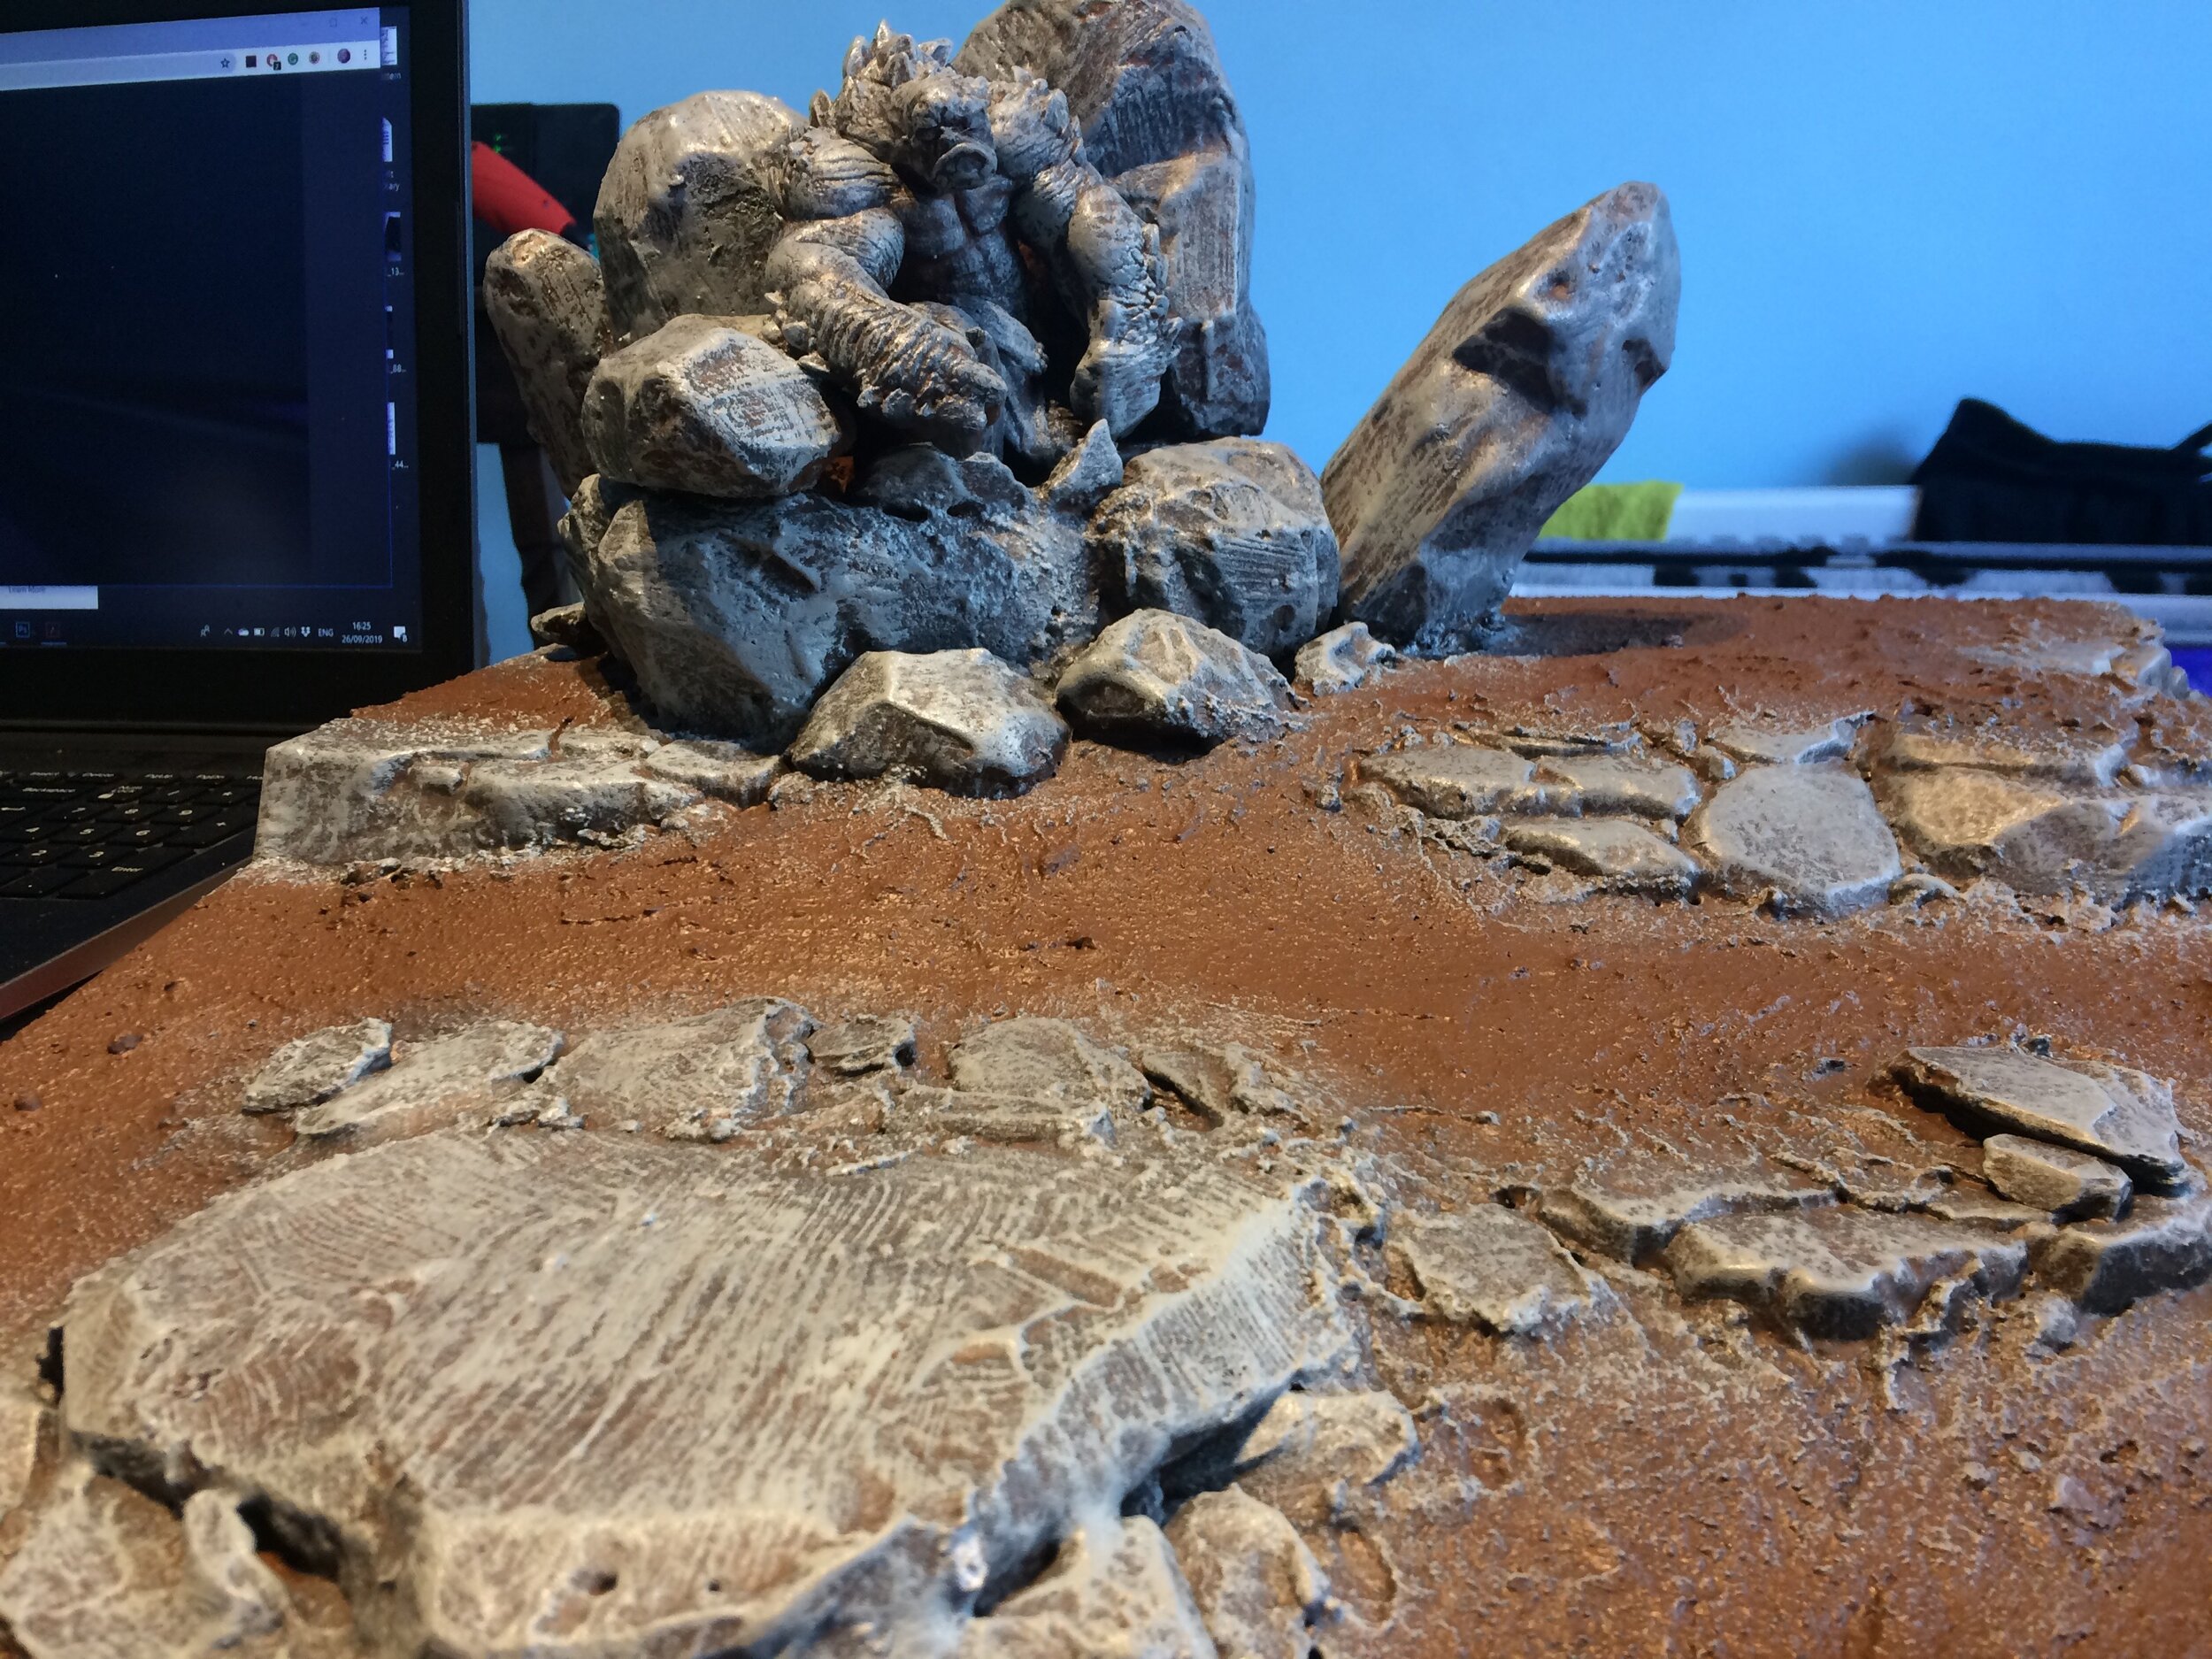
Brown Board with grey dry-brushed over brown. Looks great!
At this point it was just a case of drybrushing colours onto the board however you want. The sand mash provides a great texture for drybrushing, much more than the bare plastic of the tiles, so this was really satisfying to do. When you’re doing something like this you can vary the colour in different areas, but for speed I kept it all to a uniform brown with grey stone. I knew I was going to be adding static grass across the board, so I wasn’t too worried about keeping the drybrushing neat. If you miss any patches or the paint chips somewhere, flock will hide a million sins!
Once all the paint was dry I applied three different shades of static grass by painting areas with PVA glue then shaking the glass from a sieve, to get an even coverage. Finally, to make it look ultra-pretty I used some grass tufts (from Bad Squiddo Games, just down the corridor!) and flowers, which added some much-needed colour and made it look epic!
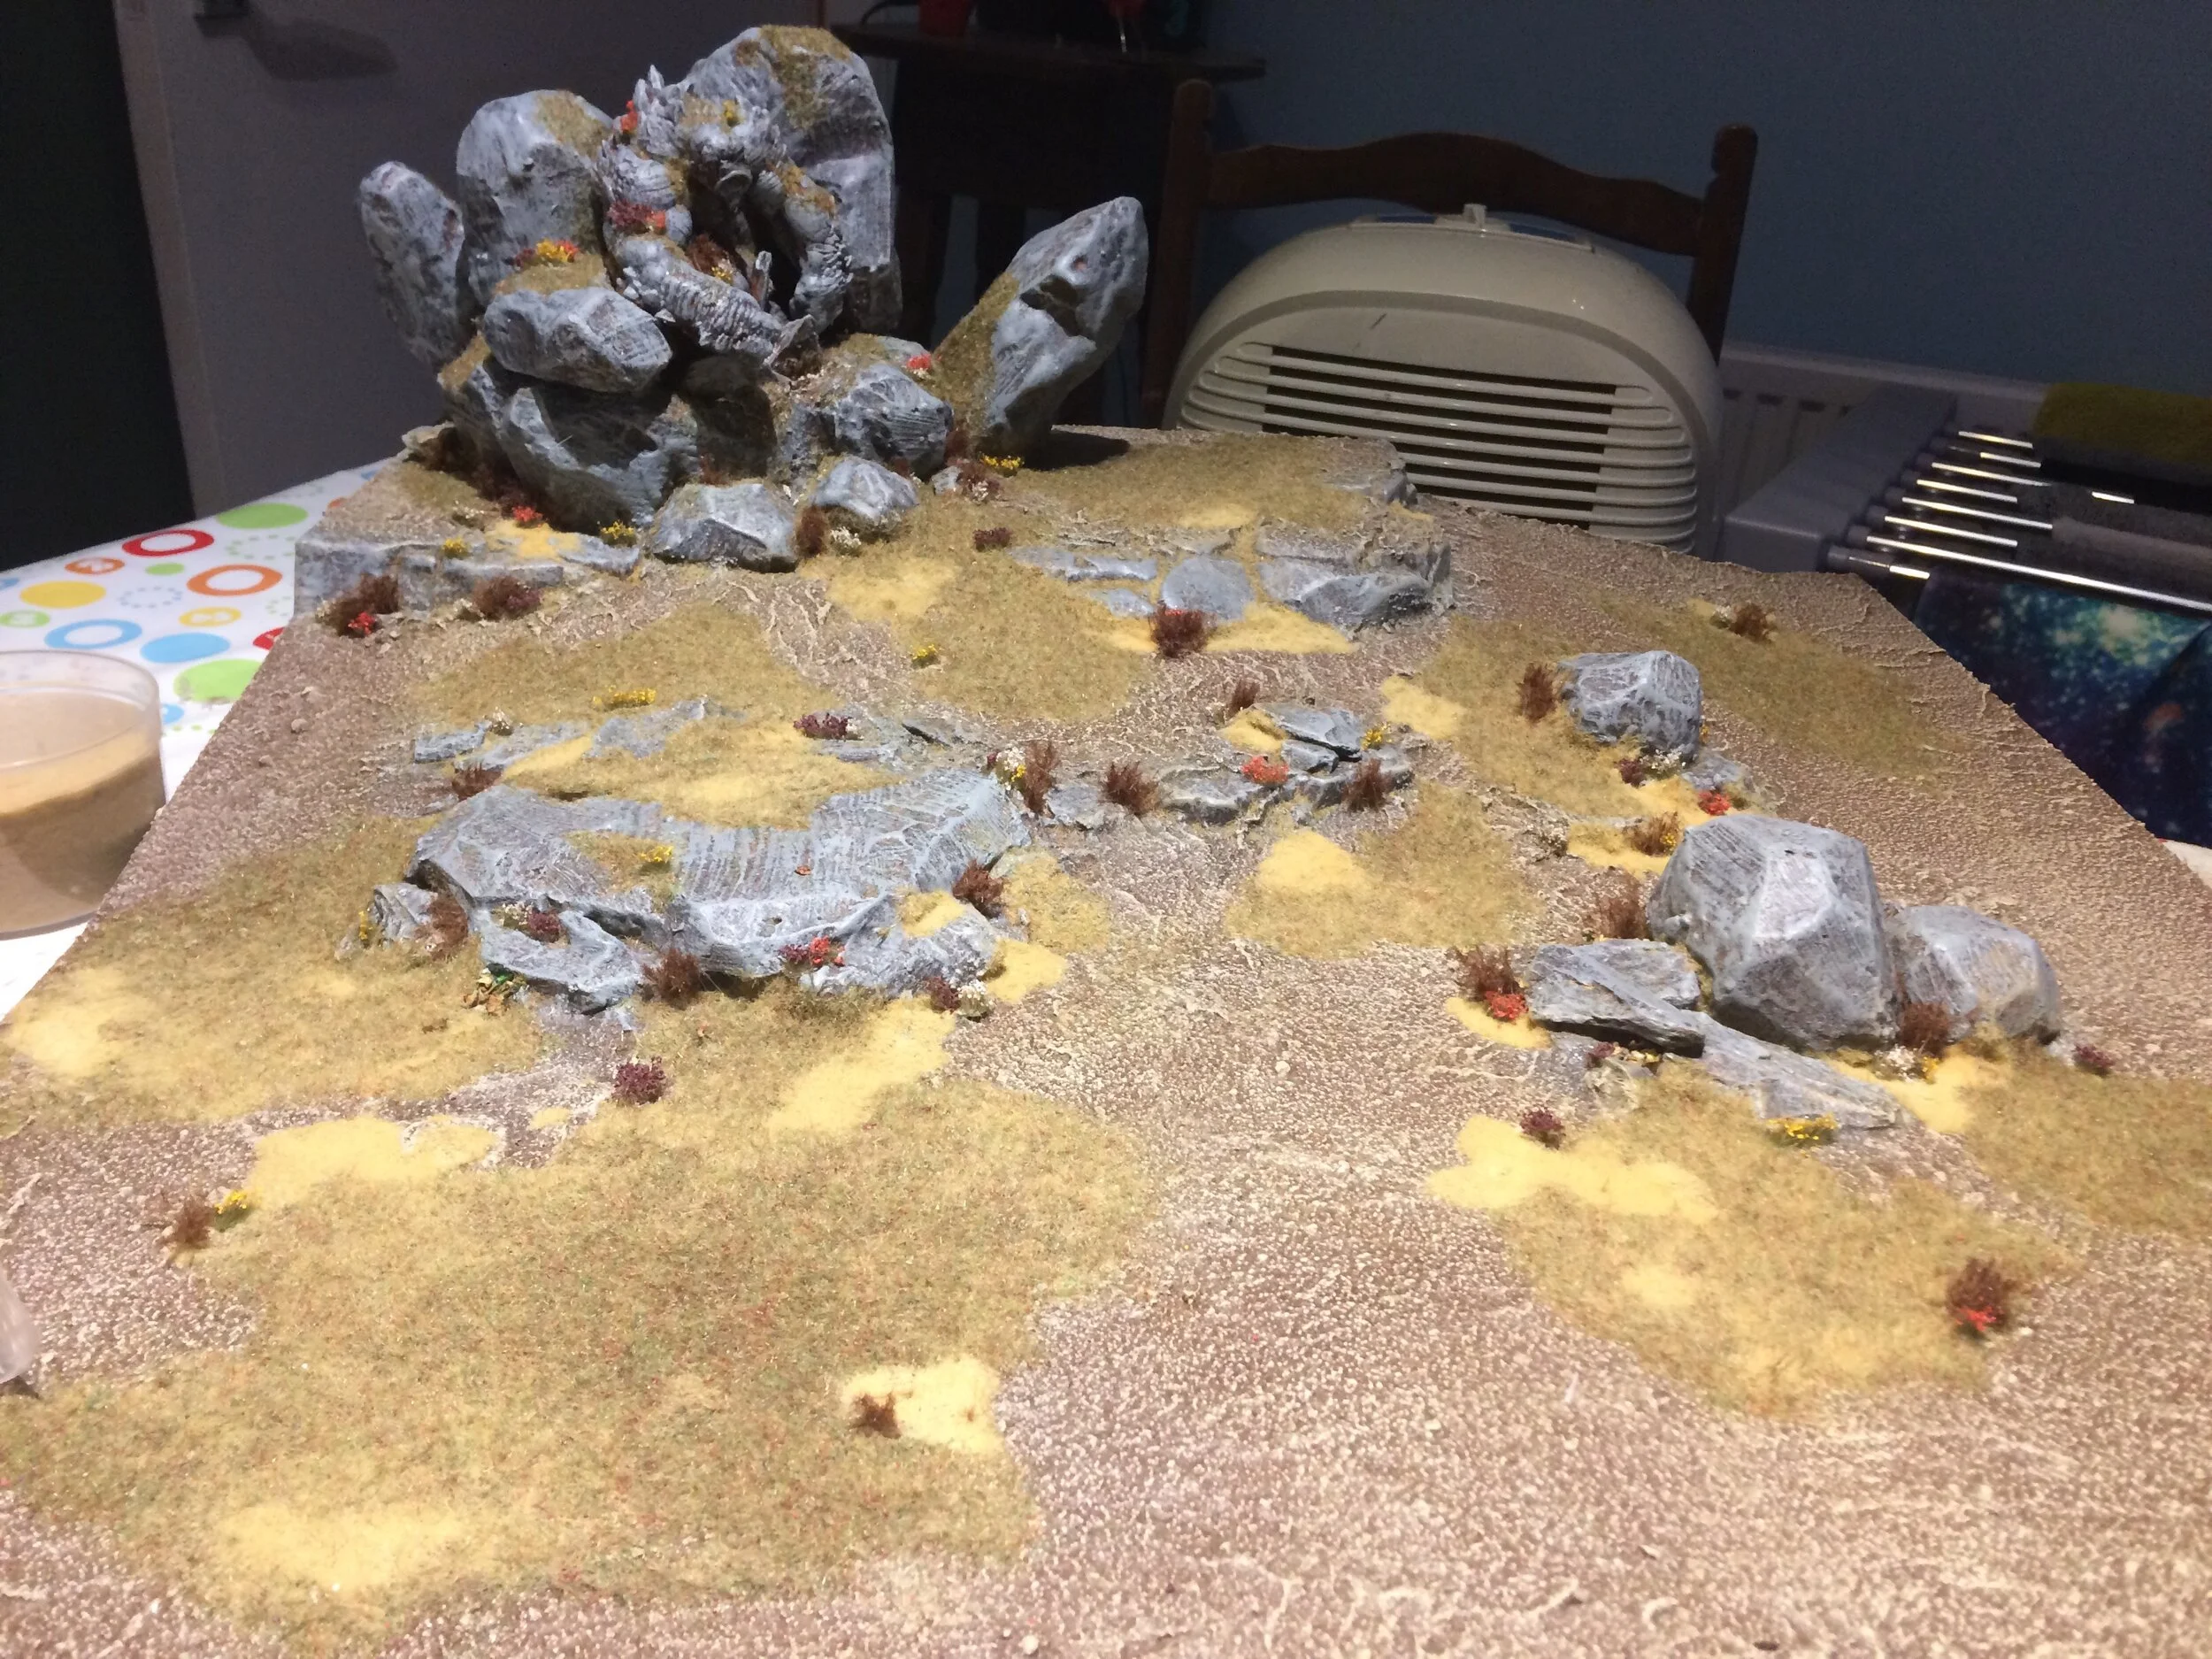
A spot of flock and some detailing with some tufts makes all the difference!
There you go! An eye-catching demo board, completed within 24 hours. Hopefully we’ve inspired you to have a go yourself - it’s surprisingly achievable, although we’d recommend giving yourself three or fours days, at least!
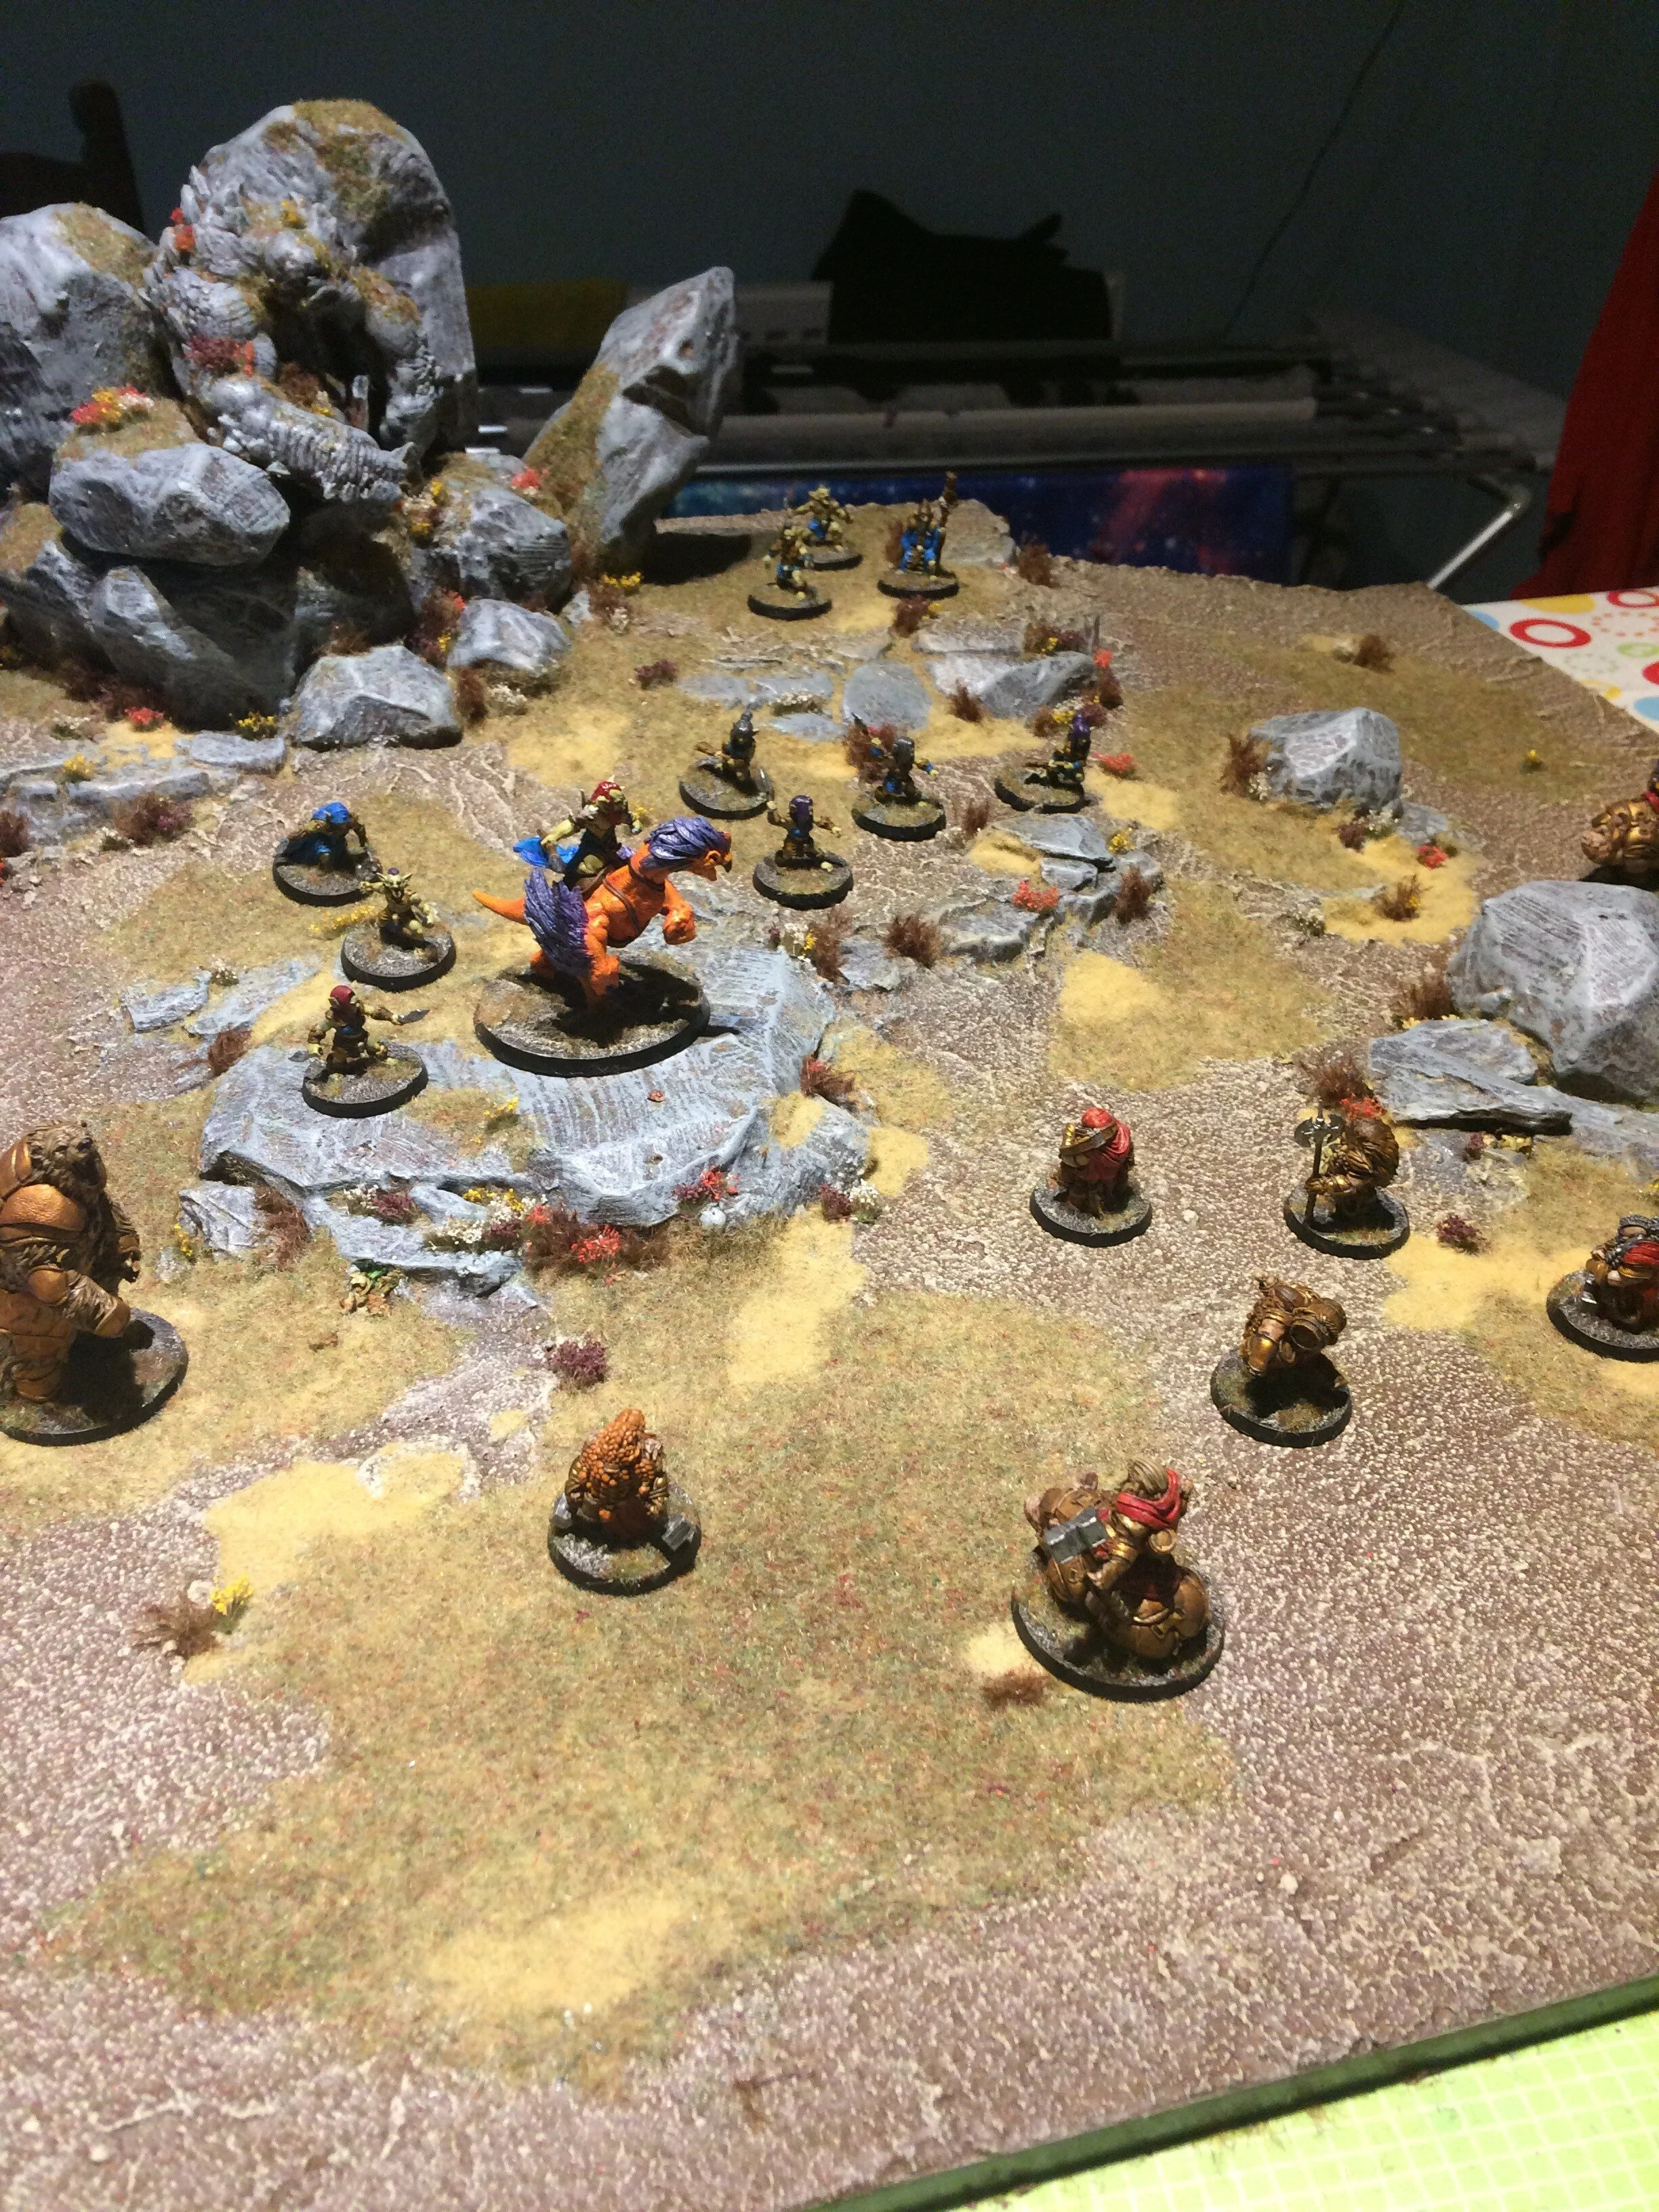
One of James’ favourite things at Tabletop Gaming Live was people only spotting the Troll after looking at the board for a few minutes.